

50 Shades of Submission
Have you ever struggled with how to edit the submit button color in Contact Form 7?
Usually when you set up a form it just appears with a dull grey button, how boring! I have a fast and easy way to change the color of the button, change the border color, add a radius, and more.
You might also like this tip because you get to use “code”, which might seem scary but you will hopefully think is cool to learn how to do.
.
Step 1) Copy this script and paste it into a Text Editor on your computer, then follow the instructions in blue and change the values to your desired styling.
input.wpcf7-form-control.wpcf7-submit {
background-color: #COLORS; /*change #COLORS to your desired button background hex color*/
border: 2px solid #COLORS; /*2px is border width (can make this 0px) and #COLORS is where you enter border color*/
padding: 10px 30px; /*10px is top and bottom padding. It will increase button height. 30px is left and right padding*/
float:left;
border-radius:0;
}
input.wpcf7-form-control.wpcf7-submit:hover{
background-color: #COLORS; /*Change the word “COLORS” to your preferred background HEX color for when you hover over the button*/
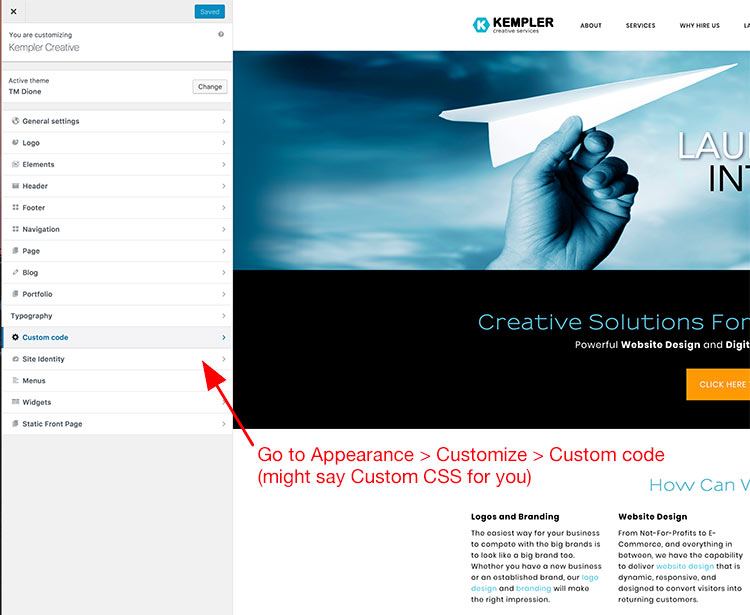
Step 2) It may look different for each Dashboard depending on the WordPress Theme you are using, but regardless of theme you should be able to go to Appearance > Customize to access the theme editor for your website.
.
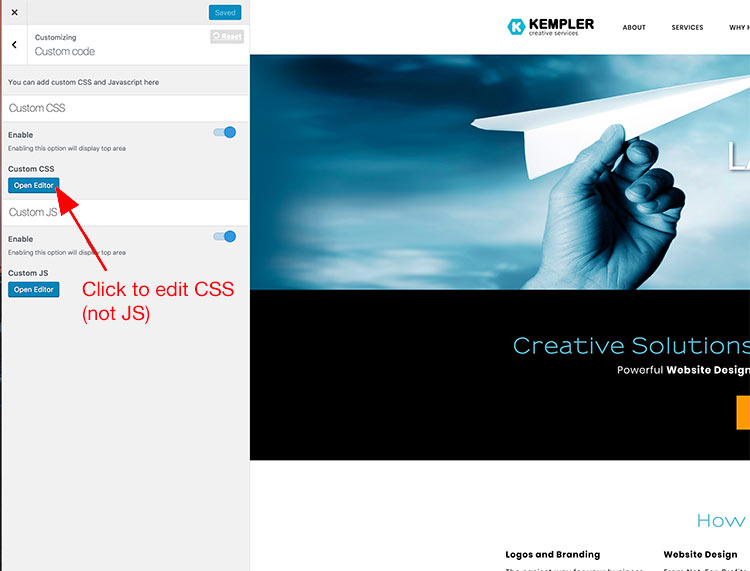
Step 3) From the Theme Customization screen, find the place where you can Edit CSS
.
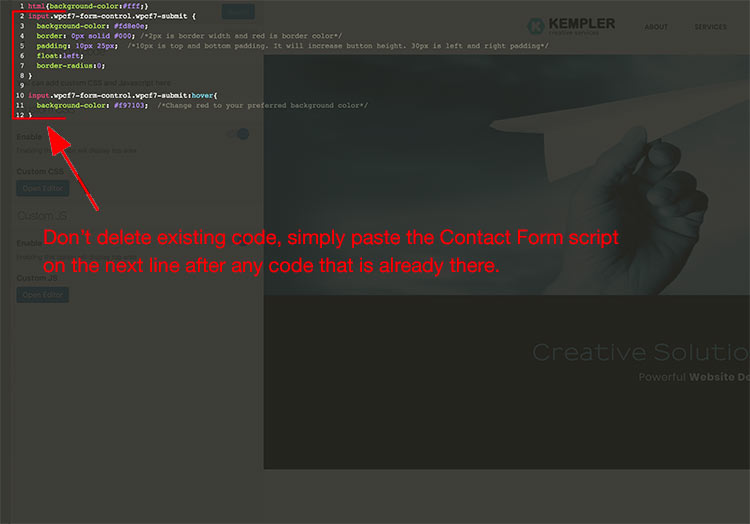
Step 4) Copy and paste the script into your CSS Editor. Do not delete any scripts that are already there. Simply click on the next available line and paste the script then save and/close the editor.
.
.
Now the buttons on your Contact Form 7 forms will have your custom colors and styling.